When creating rules based on acceptable values, the following sections: Rules Details, Acceptable Values, Acceptable Expressions, Criteria, and Alert Details must be completed as outlined below in each tab:
-
Rule Details Section
- Go to Data Governance, and click + Create New Rule.
The navigation menu may differ depending on the Neodeluxe products your firm uses.
- Enter the new rule’s Name*, and Description*.
The Is Active* dropdown field is automatically set to Yes.
- Select the Governance Source* where the fields used to configure the rule are located.
-
Governance Source*: Project Type: When this option is selected, the Project Type* field is enabled.
- Select the Project Type* for which the rule will be configured. This is the project template that contains a field where the rule will be applied.
- Governance Source*: Contact Cards: When this option is selected, the rule will be configured using information from Contact Cards.
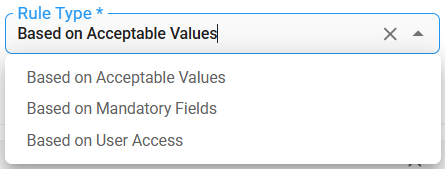
- Select the Rule Type*: Based on Acceptable Values.
-
Acceptable Values Section
- Select the Section* where the field is located.
Available options in the Section* dropdown are based on the selected Project Type* or Filevine Contact Card.
- Select the Field* that will be evaluated by the rule.
For example: For Governance Source: Project Type, the options in the Section* and Field* dropdowns are dynamically displayed based on the selected Project Type*.
For example: For Governance Source: Contact Cards, the Section* and Field* options are dynamically displayed based on the sections and fields available in the Filevine Contact Card.
- Available options in the Field* dropdown depend on the selected Section*.
- The Acceptable Expressions section will appear only when the selected Field* is one of the following types:
- Multiple Lines
- Multiple Lines (Large)
- Single Line
Users can configure either the Operator* and Acceptable Values* fields in the Acceptable Values section OR the Acceptable Expressions section, but not both simultaneously, when the field type of the selected Field* is:
- Multiple Lines,
- Multiple Lines (Large), or
- Single Line.
Configure Acceptable Values
Users can configure only the Operator* and the corresponding field in the Acceptable Values section, when the field type of the selected Field* is: Number, Percent, Decimal, Currency, or Date.
In this case, users CANNOT configure Acceptable Expressions.
For more information about configuring regex in the Acceptable Expressions section, check the Acceptable Expressions tab.
Available Operators According to the Field Type
When establishing the acceptable values expression, the available operators to compose the expression depend on the type of field of the selected Field*.
For Project Type fields: For Contact Card fields: Field Type of the selected Field* Operator* Field Type of the selected Field* Operator* Multiple Lines
Multiple Lines (Large)
Single Line
Equals
Not Equal To
Contains
Not Contains
Similar
Not Similar To
Multiple Lines
Multiple Lines (Large)
Single Line
URL
Equals
Not Equal To
Contains
Not Contains
Similar
Not Similar To
Number
Percent
Decimal
Currency
Date
Between
Equals
Greater Than
Greater Than or Equal to
Less Than
Less Than or Equal to
Not Equal To
Number
Percent
Decimal
Currency
Date
Between
Equals
Greater Than
Greater Than or Equal to
Less Than
Less Than or Equal to
Not Equal To
Dropdown
Multiple Choice
Yes/ No
Equals
Not Equal To
Checkbox
Dropdown
Multiple Choice
Switch
Yes/ No
Equals
Not Equal To
Similar/Not Similar Logic
- For text 6 characters or fewer: 100% match is required.
For Example: "Apple" is similar to "Apple" (100% match), but not to "Appl" (partial match).
- For text 7 characters or more: At least 80% match is required.
For Example: - "Contract" is similar to "Contracts" (88% match).
-
Explanation:
- “Contracts” has 9 characters.
- “Contract” matches 8 of those characters.
- 9 characters × 80% = 7.2 → rounded up to 8 characters must match.
- Since 8 characters match, it is considered similar.
- "Contract" is not similar to "Contact" (77.7% match).
-
Explanation:
- “Contracts” has 9 characters.
- The comparison text “Contact” matches 7 of those characters.
- 9 characters × 80% = 7.2 → rounded up to 8 characters must match.
- Since 7 characters match, it is considered NOT similar.
Configure Acceptable Values for Multiple Lines, Multiple Lines (Large), or Single Line Fields
When the field type selected in the Field* option is Multiple Lines, Multiple Lines (Large), or Single Line admins can create an expression using operators, to define when the rule alert is triggered. Follow these steps:
- In the Acceptable Values section, select the Operator* to compose the acceptable value expression that will be evaluated by the rule.
Available operators for these field types are: Equals, Not Equal To, Contains, Not Contains.
For example: If you select the Claimant Relationship to Client field in the Field* dropdown (which was configured as a Multiple Lines field in the corresponding Filevine Project Type), available operators are: Equals, Not Equal To, Contains, and Not Contains.
- In the Acceptable Values* field, manually write each value and press the Enter key.
- Or, click Upload CSV File to upload a CSV file that contains the acceptable values.
- You can upload a CSV file and/or write your own acceptable values. Uploading a CSV after having some manually written values will overwrite any manually entered values.
For the CSV:
- The file min size must be 1 Byte.
- The file must have at least one cell with content.
- The file must not contain subtitles or blank spaces, and you can only upload one file at a time.
- When adding an additional file, the information from the new file will be overwritten.
Configure Acceptable Values for Number, Percent, Decimal, Currency, or Date Fields
When the field type selected in the Field* option is Number, Percent, Decimal, Currency, or Date admins can create an expression using operators, to define when the rule alert is triggered.
Follow these steps:
- In the Acceptable Values section, select the Operator* to compose the acceptable value expression that will be evaluated by the rule.
Available operators for these field types are: Between, Equals, Not Equal To, Greater Than, Greater Than or Equal to, Less Than or Equal To.
For example: If you select the Referral Attorney Fee Percentage field in the dropdown Field* (which was configured as a Percent field), available operators are: Between, Equals, Greater Than, Greater Than or Equal to, Less Than, Less Than or Equal to, and Not Equal To.
- In the displayed field, indicate the value(s) to complete the expression according to the selected operator.
- Between: Fields to complete: From* and To*.
- Equals and Not Equal To: Fields to complete: Acceptable Values*.
When the field type of the selected Field* is Date, when selecting Equals or Not Equal To operator, use the Date Picker field for selecting the acceptable date or enter the date in mm/dd/yyyy format.
- Greater Than, Less Than, Greater Than or Equal to, and Less Than or Equal to: Fields to complete: Amount*.
-
Acceptable Expressions Section
A regular expression can be configured using the appropriate syntax, and can be used instead of acceptable values to define a sequence of characters that specifies a matching pattern. When the entered data in the Filevine field matches the pattern, the rule alert is triggered.
The Acceptable Expressions section can be configured, when:
- The field type selected in the Field* option is Multiple Lines, Multiple Lines (Large), or Single Line AND
- An option in the Operator* dropdown has not been selected.
- When the field type of the selected field in the Field* option is none of the specified above, the Acceptable Expressions section is disabled.
- When the Operator* is selected, the Add Regular Expressions button is disabled. In order to allow this setup, ensure no option is selected in the Operator* field.
For more information about Regular expressions, please visit: Understand Regular Expressions.
Follow these steps:
- In the Acceptable Expressions section, enter the Regular expression that will be evaluated by the rule.
- Regex’s special characters are highlighted with the following colors:
- Blue: + * ?
- Green: ( ) Expressions within ( ) are highlighted in green.
- Violet: \\ \.
- Orange: . \d \w \$ [ ] and similar expressions. Expressions within [ ] are highlighted in blue.
- When the regex is invalid, the field is highlighted in red, and a message is displayed.
- Test the expression before adding it, by entering sample texts in the Test Expression field.
The sample text is highlighted in green when the entered value matches the regular expression and in red when it does not.
- Click Add Regular Expression to add it to the Acceptable Expressions.
- Add additional acceptable expressions by repeating the process outlined above.
- Up to 100 regular expressions can be added at most.
-
Criteria Section
Configuring the Criteria section is optional in Rules Based on Acceptable Values. However, if a criterion is needed to evaluate whether a rule applies to a project, before checking if the entered value matches the acceptable values or the regex for the field, users can set up one or more criteria, each with one or more conditions.
- Configure the Criterion 1 by selecting the Variable*, Operator* and indicating the Value*.
- Click +Add Condition when required to add another condition in the Criterion 1 and complete the Variable*, Operator* and Value*.
- If required, click the Add Criterion button to create additional criteria.
- A rule is applied when one or more configured criteria are met (For example: Criterion 1 OR Criterion 2 OR Criterion N). If none of the criteria are met, the rule does not apply to the project.
- A criterion is satisfied only when ALL the conditions within it are met (For example: Condition 1 AND Condition 2… AND Condition N).
- The N in Criterion N will dynamically change based on the number of criteria added.
For a better understanding of criteria restrictions and ensure proper setup, we recommend visiting: Understand Criteria in Rules
-
Alert Details Section
- Enter the Alert Message that will be displayed if the rule is broken. After completing the setup, click Save.
- The message should inform users that the entered value is not accepted and how to complete the field correctly.
- Customize the alert message by clicking on the variable you want to add. Paste it into the Alert Message* field, the variable is enclosed in curly braces allowing to create a dynamic message.
For example: When you click on Project Name, the variable is copied to your clipboard. Paste it into the Alert Message* field, in this case {{project_name}}. The alert displayed in the Neodeluxe Sidebar will show the project name where the alert was triggered.
- After saving the rule, it is listed as a Draft, and it's fully editable.
- Associated alerts will not appear in the Neodeluxe extension while the rule is in Draft.
Have Questions or Issues?
If you have any questions or you are experiencing issues with accessing or using Neodeluxe Data Governance AI, please contact our Product Support Team:
- Email: help@neostella.com
- Submit a Request: Click here to submit a ticket
Our Product Support Team is available Monday through Friday, from 8:00 AM - 5:00 PM CST.